100 royalty-free WAV files built for motion graphics and animation. Whooshes, cinematic impacts, UI clicks, risers and more. No signup. No copyright strikes. Sync to keyframes instantly.
From Project panel to perfectly synced animation in four steps.
Step 01
Download the free pack
Grab the free 100-sound pack from VideoEditingSFX. It downloads as a ZIP with 8 category folders: Whooshes, Impacts, UI, Risers and more. Unzip it to a permanent location on your drive so After Effects can always find the files.
No signup needed
Step 02
Import into your project
Go to File > Import > File and select the SFX folder. In the dialog, choose Import As: Footage. All 100 WAV files land in your Project panel, organised by the same category folders, ready to drop into any composition.
Or double-click empty space in the Project panel to import
Step 03
Place and sync to your animation
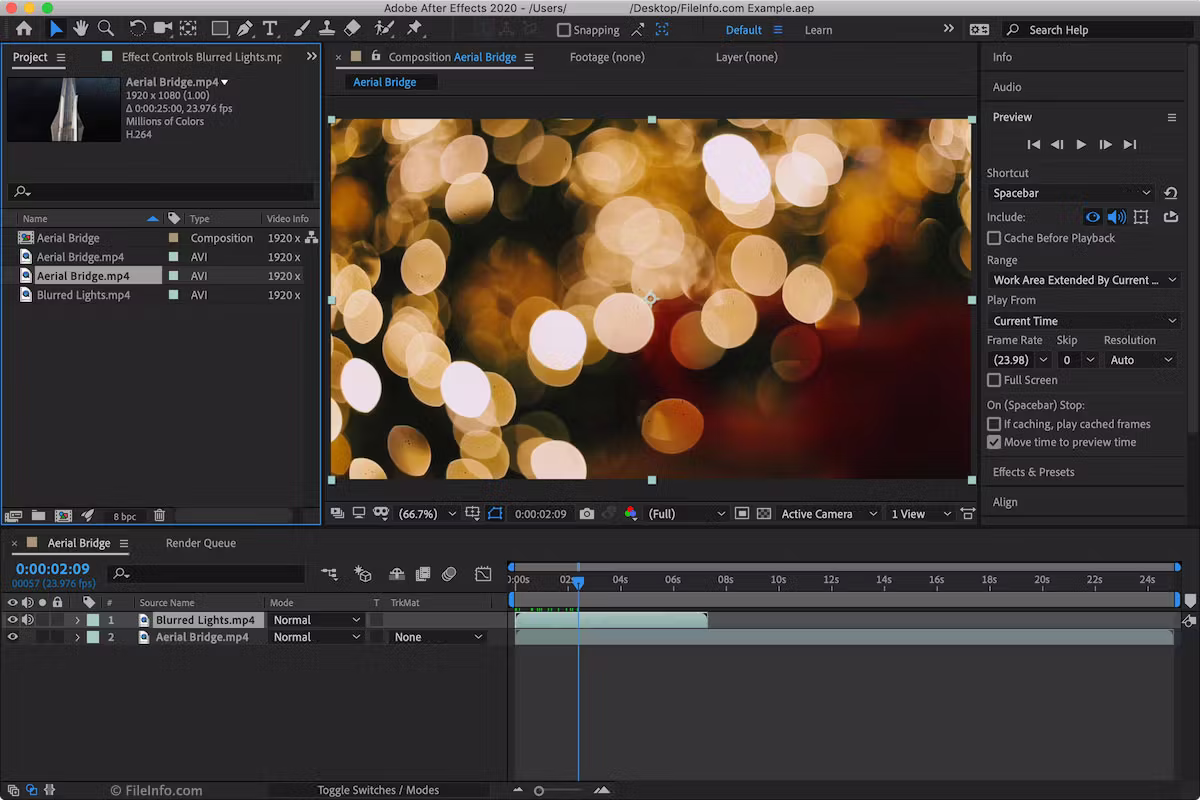
Drag the sound from the Project panel into your composition timeline. Move the audio layer's in-point to the exact frame you want it to land. Use [ and ] to nudge the layer frame by frame until the hit point lines up perfectly with your keyframe.
Use markers (M key) to flag your hit points before importing audio
Step 04
Preview and adjust levels
Press 0 on the numpad to RAM preview with audio so you can hear the sync in real time. Expand the audio layer, open Audio > Audio Levels, and keyframe the volume to fade in or duck the sound exactly where you need it.
Target -12 dB or lower to avoid clipping on export
After Effects composition: position audio layers to sync SFX with animation keyframes.
What's included
8 categories, 100 sounds
Every sound a motion designer reaches for, nothing you won't use.
💨
Whoosh & Transitions
26 sounds
Air swooshes and swipes for element entrances and exits. Perfect for text reveals and shape layer transitions.
🖱️
UI
19 sounds
Clicks, chimes and notification tones that snap to UI animation keyframes and on-screen button states.
📷
Camera FX
12 sounds
Shutter clicks and flash pops that sync with camera-shake expressions and lens flare moments.
💥
Impacts
11 sounds
Punchy hits that land on scale or position keyframes. Ideal for jump cuts and emphasis beats.
⏪
Reverse FX
11 sounds
Reversed whooshes and rewind effects that work well with time-reverse layer effects and rewind animations.
📈
Buildups
9 sounds
Tension-building sweeps for reveal moments. Line them up with opacity or scale ramps for maximum impact.
🎬
Cinematic
7 sounds
Deep cinematic hits and reveal stingers. Perfect for logo reveals, title slams and big motion-graphic moments.
🚀
Risers
5 sounds
Sweeping builds for intro animations and segment transitions. Sync the peak to your hero keyframe.
Motion design tips
Get more from SFX in After Effects
Tip 01
Convert audio to keyframes
After Effects can read the amplitude of any audio layer and turn it into data your other layers can follow. Select the audio layer, then go to Animation > Keyframe Assistant > Convert Audio to Keyframes. This creates a null layer with keyframes that rise and fall with the sound, which you can link to scale, rotation, or opacity on any layer using expressions.
Tip 02
Use markers to plan hit points
Before importing audio, scrub through your composition and press M wherever you want a sound to land. These composition markers become visible reference points in the timeline. When you drag an audio layer in, you can snap its in-point to a marker so the hit is always frame-accurate, even if you later change the animation timing.
Tip 03
Pre-comp your audio with motion
If a particular animation and its SFX always need to move together (like a button press or a logo pop), select both layers and pre-compose them. Now the audio travels with the motion inside the pre-comp, so repositioning the element in the main comp never breaks the sync. This keeps complex timelines clean and reusable.
FAQ
Common questions
Yes. All 100 sound effects are completely free to download and use in After Effects projects. No signup, no credit card, no hidden fees. Use them in client work, YouTube videos, broadcast, or any commercial project.
Go to File > Import > File, select the SFX folder, and choose Import As: Footage. Sounds appear in your Project panel. Drag any sound into the composition timeline and slide it left or right until its in-point aligns with the animation moment you want it to hit. Press 0 on the numpad to RAM preview with audio.
Yes. Use composition markers (M key) to flag hit points before importing audio, then snap audio layer in-points to those markers. You can also use Animation > Keyframe Assistant > Convert Audio to Keyframes to drive animation properties directly from the audio amplitude, letting the sound control your motion rather than the other way around.
Yes. Files come as standard WAV (48kHz / 24-bit) and MP3 — compatible with every Adobe application including Premiere Pro, Audition, and Character Animator, as well as DaVinci Resolve, Final Cut Pro, CapCut, and any other professional audio or video software.
No. These are original copyright-free sound effects. They will not trigger Content ID claims or copyright strikes on YouTube, TikTok, Instagram, or any other platform. You can use them freely in monetised content and client deliverables.